<?xml version="1.0" encoding="UTF-8"?>
<feed xmlns="http://www.w3.org/2005/Atom"  xmlns:media="http://search.yahoo.com/mrss/" xmlns:dc="http://purl.org/dc/elements/1.1/" xmlns:itunes="http://www.itunes.com/dtds/podcast-1.0.dtd" xmlns:geo="http://www.w3.org/2003/01/geo/wgs84_pos#" xmlns:georss="http://www.georss.org/georss" xmlns:photo="http://www.pheed.com/pheed/">
 <title>Hobby Forever - Maquettes des univers de l'imaginaire</title>
 <subtitle><![CDATA[Le webzine consacré aux maquettes, jouets et figurines tirés des univers manga et SF. News, tests, articles, dossiers, galeries...]]></subtitle>
 <link rel="alternate" type="text/html" href="https://www.hobbyforever.fr" />
 <link rel="self" type="text/xml" href="https://www.hobbyforever.fr/xml/atom.xml" />
 <id>https://www.hobbyforever.fr/</id>
 <updated>2026-07-19T08:58:25+02:00</updated>
 <generator uri="http://www.wmaker.net">Webzine Maker</generator>
  <icon>https://www.hobbyforever.fr/favicon.ico</icon>
  <entry>
   <title>Tutoriel "No Paint" 4 - 3e partie : Weathering au Gundam Marker et peinture</title>
   <updated>2017-10-02T22:06:00+02:00</updated>
   <id>https://www.hobbyforever.fr/Tutoriel-No-Paint-4-3e-partie-Weathering-au-Gundam-Marker-et-peinture_a756.html</id>
   <category term="Débuter le Gunpla / No paint" />
   <photo:imgsrc>https://www.hobbyforever.fr/photo/art/imagette/3190649-4563871.jpg</photo:imgsrc>
   <published>2011-08-10T19:46:00+02:00</published>
   <author><name>Zenkuro</name></author>
   <content type="html">
    <![CDATA[
     <div style="position:relative; text-align : center; padding-bottom: 1em;">
      <img src="https://www.hobbyforever.fr/photo/art/default/3190649-4563764.jpg?v=1313004024" alt="Tutoriel "No Paint" 4 - 3e partie : Weathering au Gundam Marker et peinture" title="Tutoriel "No Paint" 4 - 3e partie : Weathering au Gundam Marker et peinture" />
     </div>
     <div>
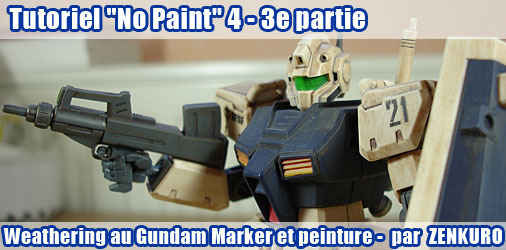
      Après avoir vu dans un 1er temps <a class="link"  href="https://www.hobbyforever.fr/Tutoriel-No-Paint-4-1ere-partie-Decoupe-et-preparation-des-pieces_a753.html">la préparation des pièces</a> puis dans une 2nd partie <a class="link"  href="https://www.hobbyforever.fr/Tutoriel-No-Paint-4-2nd-partie-Retouches-de-peinture-et-Gundam-Markers_a754.html">les retouches de peinture et le paneling au Gundam Markers</a>, voici l'ultime chapitre de ce 4ème tutoriel  consacré au No Paint : le vieillissement, également appelé weathering. Pour cela je vais vous présenter deux techniques différente...
     </div>
     <br style="clear:both;"/>
    ]]>
   </content>
   <link rel="alternate" href="https://www.hobbyforever.fr/Tutoriel-No-Paint-4-3e-partie-Weathering-au-Gundam-Marker-et-peinture_a756.html" />
  </entry>
  <entry>
   <title>Tutoriel "No Paint" 4 - 2nd partie : Retouches de peinture et Gundam Markers</title>
   <updated>2017-10-02T22:06:00+02:00</updated>
   <id>https://www.hobbyforever.fr/Tutoriel-No-Paint-4-2nd-partie-Retouches-de-peinture-et-Gundam-Markers_a754.html</id>
   <category term="Débuter le Gunpla / No paint" />
   <photo:imgsrc>https://www.hobbyforever.fr/photo/art/imagette/3185227-4555757.jpg</photo:imgsrc>
   <published>2011-08-08T11:16:00+02:00</published>
   <author><name>Zenkuro</name></author>
   <content type="html">
    <![CDATA[
     <div style="position:relative; text-align : center; padding-bottom: 1em;">
      <img src="https://www.hobbyforever.fr/photo/art/default/3185227-4555642.jpg?v=1312798937" alt="Tutoriel "No Paint" 4 - 2nd partie : Retouches de peinture et Gundam Markers" title="Tutoriel "No Paint" 4 - 2nd partie : Retouches de peinture et Gundam Markers" />
     </div>
     <div>
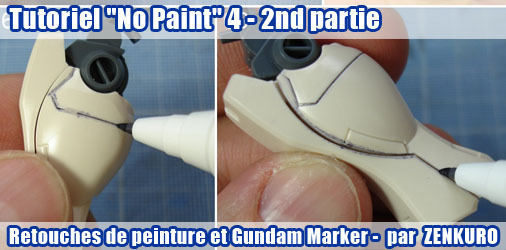
      Et voici la suite du tutoriel spécial &quot;No Paint&quot; n°4 ! Après avoir vu dans une première partie <a class="link"  href="https://www.hobbyforever.fr/Tutoriel-No-Paint-4-1ere-partie-Decoupe-et-preparation-des-pieces_a753.html">la préparation des pièces</a>, il est grand temps de nous atteler aux retouches de peinture à la Citadel et  aux Gundam Real Touch Markers. 
     </div>
     <br style="clear:both;"/>
     <div><b>4. Les retouches au Gundam Real Touch Marker</b></div>
     <div style="position:relative; text-align : center; padding-bottom: 1em;">
      <img src="https://www.hobbyforever.fr/photo/art/default/3185227-4555644.jpg?v=1496401694" alt="Tutoriel "No Paint" 4 - 2nd partie : Retouches de peinture et Gundam Markers" title="Tutoriel "No Paint" 4 - 2nd partie : Retouches de peinture et Gundam Markers" />
     </div>
     <div>
      Après les étapes de la coupe et du ponçage, il peut s'avérer que certaines zones gardent de...
     </div>
     <br style="clear:both;"/>
    ]]>
   </content>
   <link rel="alternate" href="https://www.hobbyforever.fr/Tutoriel-No-Paint-4-2nd-partie-Retouches-de-peinture-et-Gundam-Markers_a754.html" />
  </entry>
  <entry>
   <title>Tutoriel "No Paint" 4 - 1ère partie : Découpe et préparation des pièces</title>
   <updated>2017-10-02T22:05:00+02:00</updated>
   <id>https://www.hobbyforever.fr/Tutoriel-No-Paint-4-1ere-partie-Decoupe-et-preparation-des-pieces_a753.html</id>
   <category term="Débuter le Gunpla / No paint" />
   <photo:imgsrc>https://www.hobbyforever.fr/photo/art/imagette/3183948-4553616.jpg</photo:imgsrc>
   <published>2011-08-07T14:34:00+02:00</published>
   <author><name>Zenkuro</name></author>
   <content type="html">
    <![CDATA[
     <div style="position:relative; text-align : center; padding-bottom: 1em;">
      <img src="https://www.hobbyforever.fr/photo/art/default/3183948-4553574.jpg?v=1312724018" alt="Tutoriel "No Paint" 4 - 1ère partie : Découpe et préparation des pièces" title="Tutoriel "No Paint" 4 - 1ère partie : Découpe et préparation des pièces" />
     </div>
     <div>
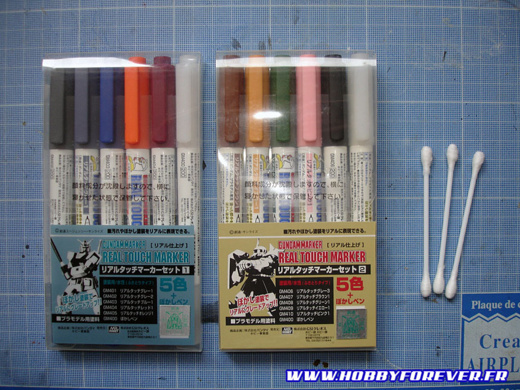
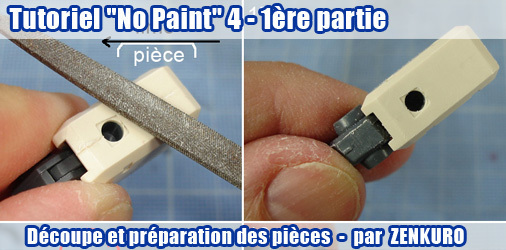
      Et c’est parti pour un nouveau tuto no paint ! Cette fois-ci l’objectif est d'axer l'article sur l'utilisation des Gundam Marker, et plus particulièrement les Gundam Real Touch Marker, <a class="link" href="http://www.hlj.com/product/GNZGMS112">set 1</a> et <a class="link" href="http://www.hlj.com/product/GNZGMS113">set 2</a>, mais pas seulement !. L'article se décomposera en plusieur...
     </div>
     <br style="clear:both;"/>
    ]]>
   </content>
   <link rel="alternate" href="https://www.hobbyforever.fr/Tutoriel-No-Paint-4-1ere-partie-Decoupe-et-preparation-des-pieces_a753.html" />
  </entry>
  <entry>
   <title>HGUC RGM-79 GM</title>
   <updated>2017-10-02T22:24:00+02:00</updated>
   <id>https://www.hobbyforever.fr/HGUC-RGM-79-GM_a368.html</id>
   <category term="Gunpla &amp; Plamo" />
   <photo:imgsrc>https://www.hobbyforever.fr/photo/art/imagette/1070146-1356787.jpg</photo:imgsrc>
   <published>2008-10-14T20:51:00+02:00</published>
   <author><name>Zenkuro  </name></author>
   <content type="html">
    <![CDATA[
Bandai, 1/144, 94 pièces, 700 JPY, 2001.     <div style="position:relative; float:right; padding-left: 1ex;">
      <img src="https://www.hobbyforever.fr/photo/art/default/1070146-1356787.jpg?v=1289491293" alt="HGUC RGM-79 GM" title="HGUC RGM-79 GM" />
     </div>
     <div>
      Voici le troufion de base de la Fédération Terrestre, le RGM-79 GM. Premier modèle de la série GM qui apparaît dans Gundam 0079, il s’agit d’un modèle au design très simpliste, destiné dans l’anime à une production de masse pour un faible coût de production. Le kit est du même acabit : petit prix pour un...
     </div>
     <br style="clear:both;"/>
    ]]>
   </content>
   <link rel="alternate" href="https://www.hobbyforever.fr/HGUC-RGM-79-GM_a368.html" />
  </entry>
</feed>