<?xml version="1.0" encoding="UTF-8"?>
<feed xmlns="http://www.w3.org/2005/Atom"  xmlns:media="http://search.yahoo.com/mrss/" xmlns:dc="http://purl.org/dc/elements/1.1/" xmlns:itunes="http://www.itunes.com/dtds/podcast-1.0.dtd" xmlns:geo="http://www.w3.org/2003/01/geo/wgs84_pos#" xmlns:georss="http://www.georss.org/georss" xmlns:photo="http://www.pheed.com/pheed/">
 <title>Hobby Forever - Maquettes des univers de l'imaginaire</title>
 <subtitle><![CDATA[Le webzine consacré aux maquettes, jouets et figurines tirés des univers manga et SF. News, tests, articles, dossiers, galeries...]]></subtitle>
 <link rel="alternate" type="text/html" href="https://www.hobbyforever.fr" />
 <link rel="self" type="text/xml" href="https://www.hobbyforever.fr/xml/atom.xml" />
 <id>https://www.hobbyforever.fr/</id>
 <updated>2026-09-16T14:44:55+02:00</updated>
 <generator uri="http://www.wmaker.net">Webzine Maker</generator>
  <icon>https://www.hobbyforever.fr/favicon.ico</icon>
  <entry>
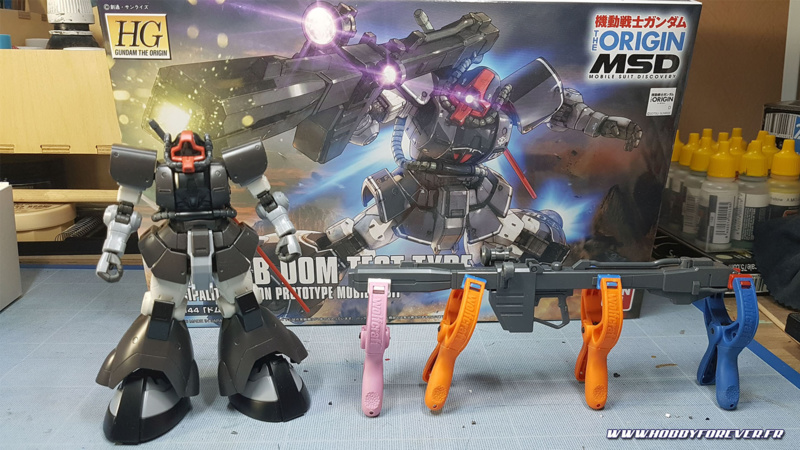
   <title>WIP - HG YMS-08B Dom Test Type - Peindre un Gunpla, 2ème partie</title>
   <updated>2020-04-11T11:38:00+02:00</updated>
   <id>https://www.hobbyforever.fr/WIP-HG-YMS-08B-Dom-Test-Type-Peindre-un-Gunpla-2eme-partie_a1081.html</id>
   <category term="Réalisations en cours / Works In Progress" />
   <photo:imgsrc>https://www.hobbyforever.fr/photo/art/imagette/44680202-36417268.jpg</photo:imgsrc>
   <published>2020-04-10T17:08:00+02:00</published>
   <author><name>Zenkuro</name></author>
   <content type="html">
    <![CDATA[
     <div style="position:relative; text-align : center; padding-bottom: 1em;">
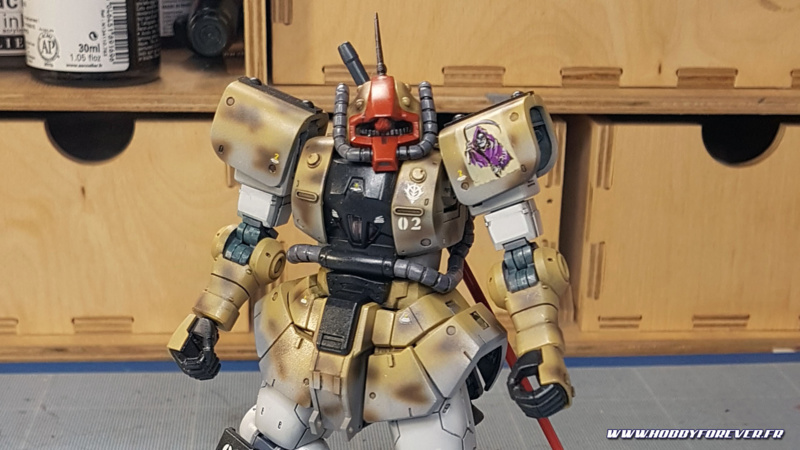
      <img src="https://www.hobbyforever.fr/photo/art/default/44680202-36417268.jpg?v=1586532462" alt="WIP - HG YMS-08B Dom Test Type - Peindre un Gunpla, 2ème partie" title="WIP - HG YMS-08B Dom Test Type - Peindre un Gunpla, 2ème partie" />
     </div>
     <div>
      Dernier article sur la réalisation de mon Dom Test Type façon Desert Op. J’aurais pu m’arrêter à l’étape précédente si j’avais voulu un modèle propre, mais j’avais dans l’idée de le patiner un peu pour lui apporter une touche de vécu. A vrai dire j’ai pas mal hésité sur le traitement à lui apporter et au final j’ai opté pour un effet éraillé / us...
     </div>
     <br style="clear:both;"/>
    ]]>
   </content>
   <link rel="alternate" href="https://www.hobbyforever.fr/WIP-HG-YMS-08B-Dom-Test-Type-Peindre-un-Gunpla-2eme-partie_a1081.html" />
  </entry>
  <entry>
   <title>WIP - HG YMS-08B Dom Test Type - Peindre un Gunpla, 1e partie</title>
   <updated>2020-04-04T10:35:00+02:00</updated>
   <id>https://www.hobbyforever.fr/WIP-HG-YMS-08B-Dom-Test-Type-Peindre-un-Gunpla-1e-partie_a1080.html</id>
   <category term="Réalisations en cours / Works In Progress" />
   <photo:imgsrc>https://www.hobbyforever.fr/photo/art/imagette/44430495-36316386.jpg</photo:imgsrc>
   <published>2020-04-04T08:53:00+02:00</published>
   <author><name>Zenkuro</name></author>
   <content type="html">
    <![CDATA[
     <div style="position:relative; text-align : center; padding-bottom: 1em;">
      <img src="https://www.hobbyforever.fr/photo/art/default/44430495-36316386.jpg?v=1585984714" alt="WIP - HG YMS-08B Dom Test Type - Peindre un Gunpla, 1e partie" title="WIP - HG YMS-08B Dom Test Type - Peindre un Gunpla, 1e partie" />
     </div>
     <div>
      Pour ce 4e article consacré à la réalisation de mon HGUC Dom Test Type, on va parler peinture. 
     </div>
     <br style="clear:both;"/>
     <div style="position:relative; text-align : center; padding-bottom: 1em;">
      <img src="https://www.hobbyforever.fr/photo/art/default/44430495-36316396.jpg?v=1585984867" alt="WIP - HG YMS-08B Dom Test Type - Peindre un Gunpla, 1e partie" title="WIP - HG YMS-08B Dom Test Type - Peindre un Gunpla, 1e partie" />
     </div>
     <div>
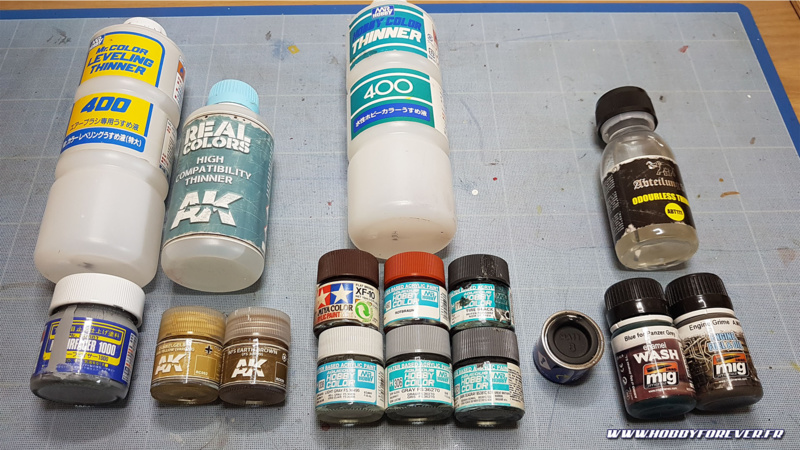
      Et pour bien démarrer l'article, voici une photo des principales peintures et diluants utilisés pour mon Dom. Ce n'est pas exhaustif, mais l'essentiel est là, pour vous aider à vous y retrouver dans les références que je donnerai plus loin dan...
     </div>
     <br style="clear:both;"/>
    ]]>
   </content>
   <link rel="alternate" href="https://www.hobbyforever.fr/WIP-HG-YMS-08B-Dom-Test-Type-Peindre-un-Gunpla-1e-partie_a1080.html" />
  </entry>
  <entry>
   <title>WIP - HG YMS-08B Dom Test Type - Détailler un Gunpla, 3e partie</title>
   <updated>2019-09-30T20:14:00+02:00</updated>
   <id>https://www.hobbyforever.fr/WIP-HG-YMS-08B-Dom-Test-Type-Detailler-un-Gunpla-3e-partie_a1079.html</id>
   <category term="Réalisations en cours / Works In Progress" />
   <photo:imgsrc>https://www.hobbyforever.fr/photo/art/imagette/37739647-33219629.jpg</photo:imgsrc>
   <published>2019-09-29T18:39:00+02:00</published>
   <author><name>Zenkuro</name></author>
   <content type="html">
    <![CDATA[
     <div style="position:relative; text-align : center; padding-bottom: 1em;">
      <img src="https://www.hobbyforever.fr/photo/art/default/37739647-33219629.jpg?v=1569776342" alt="WIP - HG YMS-08B Dom Test Type - Détailler un Gunpla, 3e partie" title="WIP - HG YMS-08B Dom Test Type - Détailler un Gunpla, 3e partie" />
     </div>
     <div>
      Et voici la suite de la réalisation du HG dom Test Type de Bandai ! Pour ce 3e article je ferai plus court dans les explications puisque l'essentiel des techniques utilisées ont déjà été présentées dans les <a class="link"  href="https://www.hobbyforever.fr/WIP-HG-YMS-08B-Dom-Test-Type-Detailler-un-Gunpla-2e-partie_a1078.html">articles précédents</a>. Vous retrouverez sur les images les précisions sur les ajouts effectués sur le kit : CP (carte plastique)...
     </div>
     <br style="clear:both;"/>
    ]]>
   </content>
   <link rel="alternate" href="https://www.hobbyforever.fr/WIP-HG-YMS-08B-Dom-Test-Type-Detailler-un-Gunpla-3e-partie_a1079.html" />
  </entry>
  <entry>
   <title>WIP - HG YMS-08B Dom Test Type - Détailler un Gunpla, 2e partie</title>
   <updated>2019-09-21T13:31:00+02:00</updated>
   <id>https://www.hobbyforever.fr/WIP-HG-YMS-08B-Dom-Test-Type-Detailler-un-Gunpla-2e-partie_a1078.html</id>
   <category term="Réalisations en cours / Works In Progress" />
   <photo:imgsrc>https://www.hobbyforever.fr/photo/art/imagette/37495846-33091865.jpg</photo:imgsrc>
   <published>2019-09-21T12:52:00+02:00</published>
   <author><name>Zenkuro</name></author>
   <content type="html">
    <![CDATA[
     <div style="position:relative; text-align : center; padding-bottom: 1em;">
      <img src="https://www.hobbyforever.fr/photo/art/default/37495846-33091865.jpg?v=1569064245" alt="WIP - HG YMS-08B Dom Test Type - Détailler un Gunpla, 2e partie" title="WIP - HG YMS-08B Dom Test Type - Détailler un Gunpla, 2e partie" />
     </div>
     <div>
      Et on se retrouve déjà pour la suite du détaillage du HG Dom Test Type de Bandai ! Dans l'<a class="link"  href="https://www.hobbyforever.fr/WIP-HG-YMS-08B-Dom-Test-Type-Detailler-un-Gunpla-1ere-partie_a1077.html">épisode précédent</a> je vous ai posé les principes du détaillage et présenté le travail effectué sur la jupe. Aujourd'hui on va voir les jambes ainsi que la tête. C'est parti !
     </div>
     <br style="clear:both;"/>
     <div><b>La face intérieure avant de la jambe</b></div>
     <div style="position:relative; text-align : center; padding-bottom: 1em;">
      <img src="https://www.hobbyforever.fr/photo/art/default/37495846-33091868.jpg?v=1569064328" alt="WIP - HG YMS-08B Dom Test Type - Détailler un Gunpla, 2e partie" title="WIP - HG YMS-08B Dom Test Type - Détailler un Gunpla, 2e partie" />
     </div>
     <div>
      Les fameuses « pattes d'éléphant » du Dom présentent u...
     </div>
     <br style="clear:both;"/>
    ]]>
   </content>
   <link rel="alternate" href="https://www.hobbyforever.fr/WIP-HG-YMS-08B-Dom-Test-Type-Detailler-un-Gunpla-2e-partie_a1078.html" />
  </entry>
  <entry>
   <title>WIP - HG YMS-08B Dom Test Type - Détailler un Gunpla, 1ère partie</title>
   <updated>2019-09-22T11:16:00+02:00</updated>
   <id>https://www.hobbyforever.fr/WIP-HG-YMS-08B-Dom-Test-Type-Detailler-un-Gunpla-1ere-partie_a1077.html</id>
   <category term="Réalisations en cours / Works In Progress" />
   <photo:imgsrc>https://www.hobbyforever.fr/photo/art/imagette/37274606-32978815.jpg</photo:imgsrc>
   <published>2019-09-13T19:50:00+02:00</published>
   <author><name>Zenkuro</name></author>
   <content type="html">
    <![CDATA[
     <div style="position:relative; text-align : center; padding-bottom: 1em;">
      <img src="https://www.hobbyforever.fr/photo/art/default/37274606-32978815.jpg?v=1568399721" alt="WIP - HG YMS-08B Dom Test Type - Détailler un Gunpla, 1ère partie" title="WIP - HG YMS-08B Dom Test Type - Détailler un Gunpla, 1ère partie" />
     </div>
     <div>
      Salut les amis ! Après une torpeur de quelques mois je reviens avec une nouvelle série d'articles consacrée à la réalisation de mon HG YMS-08B Dom Test Type. Je n'ai pas touché de Gunpla depuis quasiment 9 mois et pour ce chouette kit, j'avais envie de revenir aux sources de ce que j'aime faire : le détaillage. Ça va donc être pour moi l'occasio...
     </div>
     <br style="clear:both;"/>
    ]]>
   </content>
   <link rel="alternate" href="https://www.hobbyforever.fr/WIP-HG-YMS-08B-Dom-Test-Type-Detailler-un-Gunpla-1ere-partie_a1077.html" />
  </entry>
  <entry>
   <title>Type-A - DoDonPachi Dai-Ou-Jou - WIP part.1 : le montage</title>
   <updated>2015-07-13T18:10:00+02:00</updated>
   <id>https://www.hobbyforever.fr/Type-A-DoDonPachi-Dai-Ou-Jou-WIP-part-1-le-montage_a982.html</id>
   <category term="Réalisations en cours / Works In Progress" />
   <photo:imgsrc>https://www.hobbyforever.fr/photo/art/imagette/7770393-12035721.jpg</photo:imgsrc>
   <published>2015-05-09T11:49:00+02:00</published>
   <author><name>Zenkuro</name></author>
   <content type="html">
    <![CDATA[
     <div style="position:relative; text-align : center; padding-bottom: 1em;">
      <img src="https://www.hobbyforever.fr/photo/art/default/7770393-12035652.jpg?v=1431165973" alt="Type-A - DoDonPachi Dai-Ou-Jou - WIP part.1 : le montage" title="Type-A - DoDonPachi Dai-Ou-Jou - WIP part.1 : le montage" />
     </div>
     <div>
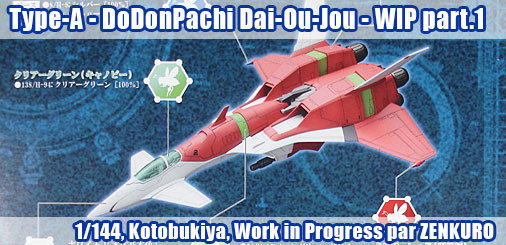
      Voilà bien longtemps que je n'avais pas fait de WIP détaillé sur HF, voilà qui va être réparé avec le Type-A 1/144 issu du jeu vidéo DoDonPachi Dai-Ou-Jou. Il s'agit d'un kit Kotobukiya à l'échelle 1/144, affiché au prix de 6800 JPY, et que j'attendais avec impatience depuis son annonce fin 2014. Il faut dire que DoDonPachi Dai-Ou-Jou est u...
     </div>
     <br style="clear:both;"/>
    ]]>
   </content>
   <link rel="alternate" href="https://www.hobbyforever.fr/Type-A-DoDonPachi-Dai-Ou-Jou-WIP-part-1-le-montage_a982.html" />
  </entry>
  <entry>
   <title>Ma.K - SEAPIG 1/20 - WIP 1ère partie : le détaillage</title>
   <updated>2015-01-10T10:07:00+01:00</updated>
   <id>https://www.hobbyforever.fr/Ma-K-SEAPIG-1-20-WIP-1ere-partie-le-detaillage_a967.html</id>
   <category term="Réalisations en cours / Works In Progress" />
   <photo:imgsrc>https://www.hobbyforever.fr/photo/art/imagette/7209266-11064700.jpg</photo:imgsrc>
   <published>2014-11-25T21:38:00+01:00</published>
   <author><name>Zenkuro</name></author>
   <content type="html">
    <![CDATA[
     <div style="position:relative; text-align : center; padding-bottom: 1em;">
      <img src="https://www.hobbyforever.fr/photo/art/default/7209266-11064675.jpg?v=1416951222" alt="Ma.K - SEAPIG 1/20 - WIP 1ère partie : le détaillage" title="Ma.K - SEAPIG 1/20 - WIP 1ère partie : le détaillage" />
     </div>
     <div>
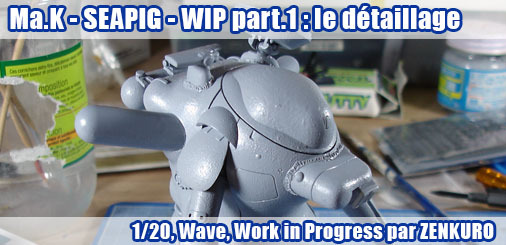
      Et c'est parti pour un nouveau WIP détaillé ! Je me suis donc attaqué au SEAPIG 1/20 de Wave, un kit issu de la license Ma.K. dont j'ai fait <a class="link"  href="https://www.hobbyforever.fr/S-A-F-S-Snake-Eye-Reconnaissance-Type-SEA-PIG-1-20-Review_a963.html">la review </a> récemment. La particularité des kits Ma.K est qu'ils sont généralement réalisés avec un weathering assez lourd et souvent avec des camouflages aux lignes flous voire déstructurées. I...
     </div>
     <br style="clear:both;"/>
    ]]>
   </content>
   <link rel="alternate" href="https://www.hobbyforever.fr/Ma-K-SEAPIG-1-20-WIP-1ere-partie-le-detaillage_a967.html" />
  </entry>
  <entry>
   <title>1/32 J7W1 Shinden - Ah ! My Goddess - WIP Part.1</title>
   <updated>2017-10-02T21:37:00+02:00</updated>
   <id>https://www.hobbyforever.fr/1-32-J7W1-Shinden-Ah--My-Goddess-WIP-Part-1_a954.html</id>
   <category term="Réalisations en cours / Works In Progress" />
   <photo:imgsrc>https://www.hobbyforever.fr/photo/art/imagette/6709077-10254836.jpg</photo:imgsrc>
   <published>2014-06-09T10:40:00+02:00</published>
   <author><name>Zenkuro</name></author>
   <content type="html">
    <![CDATA[
     <div style="position:relative; text-align : center; padding-bottom: 1em;">
      <img src="https://www.hobbyforever.fr/photo/art/default/6709077-10254645.jpg?v=1402303375" alt="1/32 J7W1 Shinden - Ah ! My Goddess - WIP Part.1" title="1/32 J7W1 Shinden - Ah ! My Goddess - WIP Part.1" />
     </div>
     <div>
      Ce coup-ci je me lance dans un WIP détaillé non pas sur une maquette de robot, mais sur un kit d'avion puisqu'il s'agit du J7W1 Shinden 1/32 de Zoukei Mura et Volks, dans sa version Ah ! My Goddess. Pour en savoir plus sur cet avion et sur le kit, je vous renvoie à l'ouverture de boite vidéo ci dessous.
     </div>
     <br style="clear:both;"/>
     <div style="position:relative; text-align : center; padding-bottom: 1em;">
      https://www.hobbyforever.fr/video/<iframe width="500" height="281" src="//www.youtube.com/embed/3EPE4GwFPJA?list=PLb2PgpG2plZjn9zTi1Q-phGqEK7QQL_Mu" frameborder="0" allowfullscreen></iframe>     </div>
     <div>
      
     </div>
     <br style="clear:both;"/>
     <div style="position:relative; text-align : center; padding-bottom: 1em;">
      <img src="https://www.hobbyforever.fr/photo/art/default/6709077-10254646.jpg?v=1402303616" alt="1/32 J7W1 Shinden - Ah ! My Goddess - WIP Part.1" title="1/32 J7W1 Shinden - Ah ! My Goddess - WIP Part.1" />
     </div>
     <div>
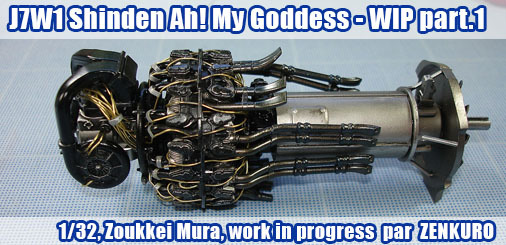
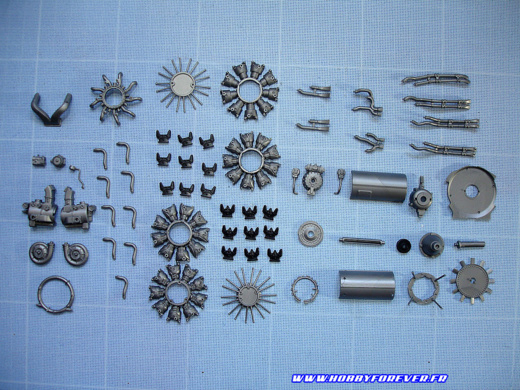
      Le montage du kit démarre par le moteur...
     </div>
     <br style="clear:both;"/>
    ]]>
   </content>
   <link rel="alternate" href="https://www.hobbyforever.fr/1-32-J7W1-Shinden-Ah--My-Goddess-WIP-Part-1_a954.html" />
  </entry>
  <entry>
   <title>R-9 A [ARROW HEAD] 1/100 - Out of Box</title>
   <updated>2014-05-02T06:28:00+02:00</updated>
   <id>https://www.hobbyforever.fr/R-9-A-ARROW-HEAD-1-100-Out-of-Box_a909.html</id>
   <category term="Montages "Out of box"" />
   <photo:imgsrc>https://www.hobbyforever.fr/photo/art/imagette/5091780-7599522.jpg</photo:imgsrc>
   <published>2013-01-03T17:48:00+01:00</published>
   <author><name>Zenkuro</name></author>
   <content type="html">
    <![CDATA[
     <div style="position:relative; text-align : center; padding-bottom: 1em;">
      <img src="https://www.hobbyforever.fr/photo/art/default/5091780-7599255.jpg?v=1357235956" alt="R-9 A [ARROW HEAD] 1/100 - Out of Box" title="R-9 A [ARROW HEAD] 1/100 - Out of Box" />
     </div>
     <div>
      
     </div>
     <br style="clear:both;"/>
     <div style="position:relative; text-align : center; padding-bottom: 1em;">
      <img src="https://www.hobbyforever.fr/photo/art/default/5091780-7599311.jpg?v=1357236854" alt="R-9 A [ARROW HEAD] 1/100 - Out of Box" title="R-9 A [ARROW HEAD] 1/100 - Out of Box" />
     </div>
     <div>
      C'est un nouveau Work in Progress que je vous présente aujourd'hui, sur la thématique qui m'est chère des Shoot them up avec rien de moins que le célèbre R-9 A [ARROW HEAD]. Le nom ne vous dit peut-être rien mais son design aura sans nul doute évoqué des souvenir chez les gamers trentenaires puisqu'il s'agit du vaisseau du cultissime b['R-Type']...
     </div>
     <br style="clear:both;"/>
    ]]>
   </content>
   <link rel="alternate" href="https://www.hobbyforever.fr/R-9-A-ARROW-HEAD-1-100-Out-of-Box_a909.html" />
  </entry>
</feed>